Creating and editing classes
Classes are basic elements that describe the data structure within a model. Classes are composed of properties and represent database structures such as database fields and tables.
On the diagram, classes are displayed as light-blue shapes (by default). You can move, resize, and collapse them. You can also customize their visual appearance. For more information, see Diagram Skins and Shape Colors.
Creating a class
You can add classes to the model by dragging existing tables from Database Explorer or by creating a new class manually.
To create a new class manually, use one of the following options:
- Click New Class
 on the Model toolbar.
 - Click New Class on the Model Explorer toolbar. This adds a new class to the model only.
- Press Alt+C.
- Right-click the diagram and select New Class from the Add submenu.
- Right-click the Classes node in Model Explorer and select New Class. This adds a new class to the model only.
- On the Model menu, select New Class (standalone application only).
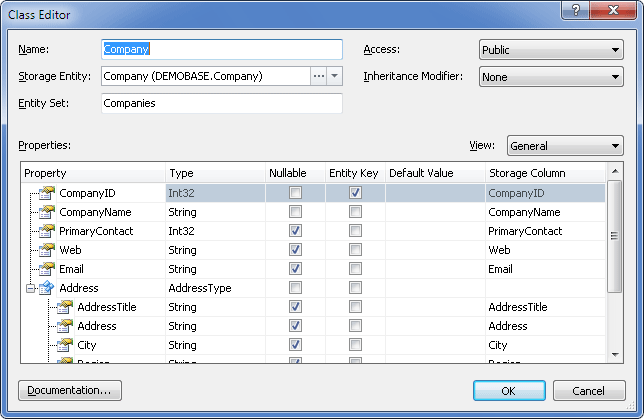
Any of these actions opens the Class Editor dialog box, where you can set class parameters and create class properties.
To create an empty class with the default name:
- Press Insert in the Classes node of Model Explorer. The class is added to the model but not shown on the diagram.
- Press Insert in the active diagram area. This adds an empty class to both the diagram and the model.
To add an existing class from Model Explorer to the diagram together with related objects, right-click the class and select Add On Diagram With Related.
In addition to dragging objects from Database Explorer, you can use table context menu commands:
- Add To Model - Adds the selected table to the model. The class is added to the model but not shown on the diagram.
- Add To Model With Related - Adds the selected table together with related objects. The class and related objects are not displayed in the diagram area.
Editing a class
To edit a class:
-
Double-click the class on the diagram or in Model Explorer.
The Class Editor dialog box opens.
-
In the Class Editor dialog box, set class parameters and edit class properties such as names, types, and default values.
-
To add summary information about the class, click Documentation to open Documentation Editor.
-
To add a property, use the shortcut menu of the Class Properties grid or press Insert.
The Property Editor dialog box opens, where you can set property parameters. You can also open it by selecting the class and pressing Alt+P. For more information, see Working with properties.
-
To change the order of properties, drag them to the required positions on the diagram or in Model Explorer.
Note
When you rename a class, property, or another model object, the change is applied during code refactoring after you save the model. Code refactoring is available only in Entity Developer installed as a Visual Studio add-in.
Deleting a class
To delete a class:
- To remove the class from the diagram only, select it in the diagram and press Shift+Delete.
- To delete the class from the model, right-click it on the diagram or in Model Explorer, and select Delete. You can also press Delete.
Entity Developer then prompts you to confirm whether to delete the object from the model.